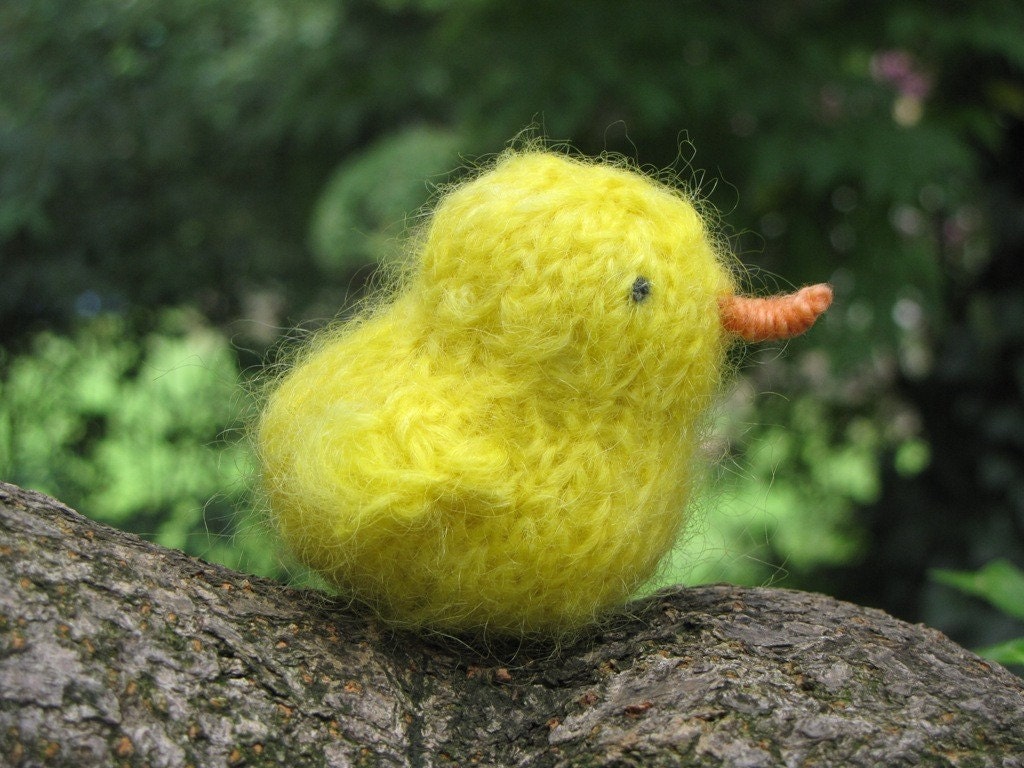
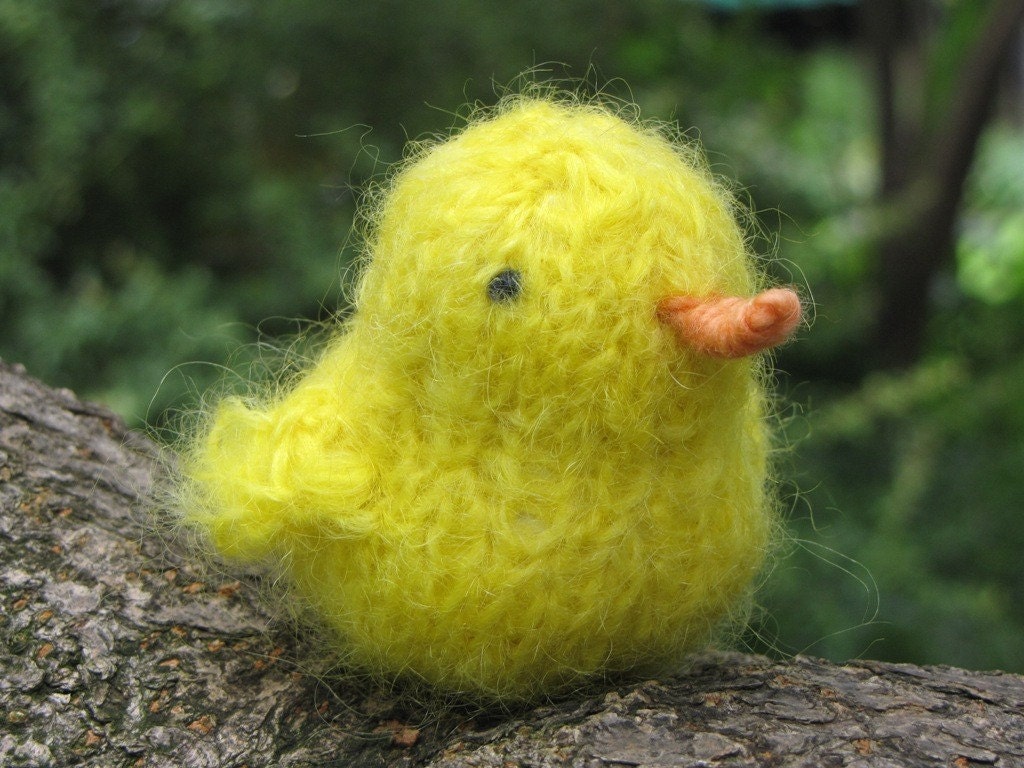
Wishing you a wonderful Easter...
Showing posts with label Easter. Show all posts
Sunday, April 24, 2011
Sunday, April 17, 2011
Just in Time for Easter...
On Friday, the hatchery called us to let us know that our day old chicks were ready for collection! So exciting... as you can imagine. We all jumped in the car and drove off to fetch them. They are the sweetest little fluffy creatures you have ever seen. It is cooling down here at the moment, so we have made a special place for them inside until they are a little bigger. Today, we took them out for the first time. It has been raining for a few days, but today the clouds cleared and we took them out to enjoy the sunshine. As soon as the sun touched their feathers, they spread themselves out and suntanned, so sweet, we could hardly believe it. They have never seen how to do this, but their instinct was so strong, it was lovely to watch...
Of course they all have names already and each child has chosen 2 to look after...


Here is a little chicken pattern for you to knit:)
xo
Labels:
Chickens,
Easter,
Easter Chicken,
Knitting
Sunday, March 27, 2011
Easter Rabbit Egg Cozy Knitting Pattern Tutorial
Easter will soon be here, I still have so many treasures to make for my little ones, I thought I would share this Easter rabbit egg cozy knitting pattern with you. He knits up so quickly:) I have knitted this one in a bamboo yarn, so soft, but any leftover yarn will be perfect for this small project. You could even add a little nose and eyes with fleece and a felting needle, I just decided to leave this one plain:) He took about half an hour to make this morning while I was busy preparing lunch. When I had a moment, I would quickly pick up my knitting and add a few more rows. I have been looking for an easy crochet pattern for slippers, if anyone knows of one, won't you please point me in that direction, thank you so much.
What Easter projects are you busy with at the moment?Enjoy!
Materials:
DK or any left over yarn
4mm circular needles
Wool needle for sewing up
Cast on 9 stitches on circular needles. I have used the Magic Loop Method of knitting.
Knit 1 round
Knit into the front and back of each stitch in next round increasing your stitches to 18.
Knit 1 round
Knit into front and back of each stitch in next round increasing your stitches to 36.
Knit garter stitch for 12 rounds.
Knit 4 rounds of purl stitch and then cast off :)
Sew in all ends. Sew around the opening where you began knitting, just thread through the stitches and pull tight.
Ears:
Cast on 5 stitches.
Knit 8 rows in garter stitch.
Knit the first 2 stitches together on each row until there is 1 stitch left.
Cast off.
Attach to the top of the cozy.
Happy day to you:)
xo
Linda
Please note, this pattern is for personal use only, and not for resale, items knitted from this pattern may not be sold for commercial purposes, thank you.
Tuesday, March 15, 2011
Easter and Spring Knitting Patterns & Tutorials from This Year and Last Year
Hi everyone, I thought I would blog all of my Easter and Spring patterns and tutorials here, some are from last year and others are from this year with more to follow in the next few weeks:)
Enjoy crafting and knitting:)
Easter Rabbit Pattern.

Enjoy crafting and knitting:)
Easter Rabbit Pattern.
Knitted Easter Egg Pattern.
Easter Nest with Eggs Pattern (these eggs are half the size of my other eggs).

Easter Chicken Pattern.
Easter/Spring Robin's Nest Tutorial
Bluebird Knitting Pattern.
Easter Gift Bag Tutorial.
Dandelion Knitting Pattern.
Easter / Spring Egg Cozy Pattern.
Ladybug Pattern.
Spring Mobile Tutorial.
Spring Knitted Snail Pattern.
Sunday, March 13, 2011
Easter Nest and Egg Pattern Tutorial
Hello wonderful friends, thanks so much for visiting:) Today, I have been working on a pattern for Easter crafting. We will soon be setting up our Easter tree and I wanted to make something special, so I have Knitted a nest in handspun Alpaca yarn, spun by my daughter Jenna. Inside the nest are some rainbow eggs. I have knitted the nest with a textured appearance to give it the look of a true nest. I do hope you enjoy knitting these patterns:)
Materials:
Yarn for the nest, I have used handspun Alpaca
Yarn for eggs, I have used rainbow cotton DK
4.5 mm circular needles
Wool needle for sewing up
Fleece for stuffing the eggs
Pattern:
Nest:
Cast on 10 stitches
Join for knitting in the round (Magic Loop)
Round 1: Knit
Round 2: Increase into each stitch across the round (20 stitches)
Round 3: Knit
Round 4: (Increase into the first stitch, knit 2 stitches, increase into the next stitch, knit 2 stitches) repeat across the round, knit 1 stitch on the end. (26 stitches)
Round 5: Knit
Round 6: Increase into each stitch. (52 stitches)
Round 7: (Knit 1 stitch, purl 1 stitch) repeat across round.
Round 8: (Purl 1, knit 1) repeat across round.
Round 9: (Knit 1 stitch, purl 1 stitch) repeat across round.
Round 10: (Purl 1, knit 1) repeat across round.
Rounds 11- 14: Knit
Round 15: (Knit 1 stitch, purl 1 stitch) repeat across round.
Round 16: (Purl 1, knit 1) repeat across round.
Round 17: (Knit 1 stitch, purl 1 stitch) repeat across round.
Rounds 18-21: Knit
Rounds 22-23: Purl
Cast off.
Sew in the ends.
Egg Pattern:
Cast on 4 stitches and join for knitting in the round.
Round 1: Knit
Round 2: Increase into each stitch (8 stitches)
Round 3: Knit
Round 4: Increase into each stitch (16 stitches)
Rounds 5-13: Knit
Round 14: (Knit 3 stitches, knit 2 stitches together) repeat across the round, knit 1 stitch on the end.
Round 15: Knit
Round 16: (Knit 1 stitch, knit 2 stitches together) repeat across the round, knit 1 stitch on the end.
Round 17: Knit
Round 18: (Knit 1 stitch, knit 2 stitches together) repeat across the round.
Round 19: Knit
Finishing off:
Break your thread and thread your yarn onto a wool needle and thread your stitches from your circular neeldes onto your wool needle and pull tight to close the opening. I normally fill the egg from this end and make sure the the wide base is firm and then fill the rest of the egg. Close both ends by threading tight in a circle with your thread and pulling tightly closed.
Roll your egg in your hands to get the required egg shape, and there you have an Easter Egg:)
Wishing you all an inspired week.
xo
Linda
Labels:
Craft,
Easter,
Knitted Eggs,
Knitted Nest,
Knitting,
Mamma4earth,
Pattern,
Tutorial
Sunday, March 6, 2011
Slug Knitting Pattern
Hello there wonderful friends!
Because we have a veggie garden AND because slugs LOVE our lettuce patch, I felt I just had to knit up a sweet little slimy slug with needle felted eyes that pop up out at you when you least expect it...
I cannot tell you how many times I have picked a lettuce and right inside the innermost folds of lettuce leaves, where you would least expect to find any living thing, will be a complete family of slugs with an extended family to boot... so they are like part of the family here...
This is really the easiest little pattern in the world, promise:) and will be great to add to your Easter baskets for Easter morning too:)
Materials:
DK yarn in sluggy colours
2 double pointed needles
Wool sewing up needle
Fleece for stuffing
Fleece for the eyes, black and white
Felting needle and sponge
With double pointed needles cast on 7 stitches, knit an I-cord for 3 inches and cast off. Stuff your slug with fleece and finish off the ends.
Knit about 5 rows for the length of the eye stalks and then cast off.
Here is your slug, now to add the eyes. Needle felt the white fleece onto the top of the eye stalks first and then needle felt a tiny black dot into the middle of the white. And there you have your slimy, slithery slug!
Happy day to all:)
Linda
Labels:
Easter,
Knitted Toys,
Knitting,
Mamma4earth,
Pattern,
Slug
Thursday, February 17, 2011
Our Work In Progress...
We have been busy with quite a few projects this week so far. Remember those Angora / Merino batts that I drum carded, well, this is the spun up yarn in the photo below, it is wonderfully soft and I will probably knit my little ones some Easter rabbits with it... It was definately an easier spin by blending it with the Merino.
Jen has made an early start on her winter knitting, she is knitting up a pair of fingerless gloves from this lovely book, Last-Minute Knitted Gifts, she is almost finished the second glove. She did make a few changes, she added more rows before the cast off for the thumb and after, she felt that they were just too short and now she is very happy with them:)
My dried and skeined cochineal Merino yarn, I really love the colour, the skeins on top of the pile are darker and were dyed up first, the two at the bottom were dyed in an exhaust dye bath (just means I re-used the dye to dye up those two skeins (exhaust dye bath) and now I have a lovely lighter shade:) I am now re-using that same dye bath to dye up some Mohair and I expect I will have a wonderfully light pink shade...
Mohair dye bath.
I am almost finished my new pattern for an African Penguin, they are found along the south and west coast of South Africa. His pattern will be in my Etsy soon.

On Sunday I finished my Easter nests for my shop, here is a little tutorial if you would like to make your own:)
Happy Thursday everyone:) xo
Thursday, February 3, 2011
Mamma4earth Easter Chicken Knitting Pattern Tutorial
Easter is just around the corner so I thought I would knit up and share a sweet little knitted Easter Chicken pattern with you:) I have knitted him in the round in the Magic Loop with a circular needle, such a Wonderful technique this, I love it! I have knitted some chickens with wings and some without. Enjoy the pattern:)


Materials:
Yellow Brushed Mohair or DK Merino yarn
Wool sewing needle
4 mm circular needle
Roving for stuffing
Orange Merino yarn for the beak
Felting needle
Black fleece
Pattern:
This little Easter Chicken is knitted in the Magic Loop Technique in the round with a circular needle.
Cast on 9 stitches
Round 1: Knit
Round 1: Knit 1 round.
Round 2: Knit into the front and back of each stitch for 1 round (18 stitches).
Round 3: Knit 1 round.
Round 4: Knit into the front and back of each stitch for 1 round (36 stitches).
Knit eleven rounds.
Round 16: (Knit 1 stitch, knit 2 together) repeat across this round.
Round 17: Knit 1 round.
Round 18: (Knit 1 stitch, knit 2 together) repeat across this round.
Rounds 19-25: Knit.
Round 26: Knit 2 together across the round.
Round 27: Knit
Round 28: Knit 2 together across the round.
Break yarn and thread the yarn onto a wool needle and thread the remaining stitches through the wool needle and leave until you are finished filling your bird with stuffing.
Once you have stuffed your chicken firmly, shape as seen in the above photo.
Wings:
Knit wings in garter stitch (plain)
Cast on 5 stitches.
Knit first and second row.
Row 3: Cast on 2 stitches at the beginning of the row and 1 stitch at the end of the row.
Row 4: Knit.
Row 5: Cast on 1 stitch at the beginning and knit 2 together at the end of the row.
Row 6: Knit.
Row 7: Knit 2 stitches together at the beginning of the row, knit to the end of the row.
Row 8: Knit.
Cast off.
Sew on wings.
One that has been knitted without wings.
Beak:
Sew a loop with the orange yarn and weave in and out of the loop. Make the end of the beak sharp and pointed (just like a chicken's :)

Needle felt on the eyes with black fleece.
Happy Thursday to you all:)
Visit the Mamma4earth Ravelry Group!
Please note, this pattern is for personal use only, and not for resale, items knitted from this pattern may not be sold for commercial purposes, thank you.
Sunday, April 4, 2010
Happy Easter!
To everyone who stops by here, thank you so much for visiting:) I wish you and your families a wonderful Easter:)
Have a lovely day...
Warmly Linda and Family:)
Labels:
Easter
Thursday, April 1, 2010
The Next Installment of our Travelling Easter Tree Tutorials...
Hello everyone,
We are having such rainy weather at the moment, I love the rain... I am so looking forward to winter here, sitting by the warm fire, being all cozy and of course knitting... :)
And now for the next installment of Heidi and my Easter Tree Tutorials... I thought I would make some knitted Easter eggs for the tree:)
As you can see Heidi has added homemade Easter biscuits that are divine and you can find the recipe for them here. I have added solid and striped knitted Easter eggs, some I have knitted in cotton and bamboo and others I have knitted in Mohair.
Knitted Easter Egg Tutorial:
I have knitted these eggs with The Magic Loop technique:
You Tube Videos:
You Tube link for how to knit with the Magic Loop.
Here is a You Tube video link on how to change colours while knitting in the round.
Knitted Easter Egg Pattern:
Cast on 9 stitches on circular needles and divide up as seen in the photo above to start knitting:)
Knit 1 round
Knit into the front and back of each stitch in next round increasing your stitches to 18.
Knit 1 round
Knit into front and back of each stitch in next round increasing your stitches to 36.
Knit 6 rounds
Change colour, knit 4 rounds,
Change colour
(Knit 5 stitches knit 2 together) continue this across the entire round and knit 1 stitch at the end of the round.
Knit 1 round.
(Knit 5 stitches, knit 2 together) continue this across the ertire round, knit 3 stitches on the end.
Knit 1 round.
(Knit 5 stitches, knit 2 together) continue this across the round, knit 1 stitch on the end.
Knit 1 round.
(Knit 2 together) continue all across the round.
(Knit 2 together) continue all across the round, knit 1 on end.
(If you just want to knit a solid egg, just knit through all the rows on the same colour:)
Finishing off:
Break your thread and thread your yarn onto a wool needle and thread your stitches from your circular neeldes onto your wool needle and pull tight to close the opening. I normally fill the egg from this end and make sure the the wide base is firm and then fill the rest of the egg. Close both ends by threading tight in a circle with your thread and pulling tightly closed.
Roll your egg in your hands to get the required egg shape, and there you have an Easter Egg!
I just tied a little thread of rainbow yarn through the top of my egg so it could hang in the tree, you could also crochet a chain if you like.
Here is the actual link with photos of my knitted Easter Egg tutorial:)
If you have knitted any Easter eggs from this pattern already and blogged them, please share your blog post link with us in the comments, we would all love to see your creations:)
Share the Love Heart Swap:
We are in full swing with our Share the Love Heart Swap, thank you to everyone who has sent in their names and details, if you haven't heard from us yet you will soon and we will partner you up with a swap partner:) If you would still like to join, please do and don't forget to send in your name, address and blog link to myself lindadawkins@mweb.co.za or Heidi at gerry@mweb.co.za and we will partner you up for the swap.To read more about the swap, view here.
Happy Thursday friends, from rainy South Africa,
Warmly
Linda
Wednesday, March 24, 2010
Knitted Easter Patterns and Tutorials
Hi everyone,
Today was a lovely day, this morning our knitting group met and we laughed and knitted, it really is such a wonderful group and I look forward to it every Wednesday...
I have decided to put all my Easter knitting tutorials and patterns together into this post for anyone who would like to knit some Easter treasures for Easter morning. Enjoy!
Knitted Easter / Spring Snail Pattern.
Knitted Easter nest / Basket Pattern.
Knitted Easter Egg Cozy Pattern.
Knitted Easter Egg Pattern.
Easter Drawstring Gift Bag Tutorial.
Knitted Easter Rabbit / Bunny Pattern.
Easter Transparency Tutorial.
Just thought it would be nice to have them all in one place for Easter knitting:)
Have an inspired Wednesday everyone,
Warmly
Linda
Monday, March 22, 2010
Knitted Easter Egg Cozy Pattern / Tutorial
Hello everyone:)
Knit 1 round
Knit into the front and back of each stitch in next round increasing your stitches to 18.
Knit 1 round
Knit into front and back of each stitch in next round increasing your stitches to 36.
Knit garter stitch for 12 rounds.
Knit 4 rounds of moss stitch or 4 rounds of purl for a rib and then cast off :)
Sew in all ends. Sew around the opening where you began knitting, just thread through the stitches and pull tight.
View from the front:)
I am going to make one for each member of our family with a different little felt creature on each cozy:)
Happy knitting everyone,
Warmly
Linda
Please note, this pattern is for personal use only, and not for resale, items knitted from this pattern may not be sold for commercial purposes, thank you.
Happy Spring Equinox to all those living in the Northern Hemisphere and Happy Autumn Equinox to those living in the Southern Hemisphere:)
I have been putting together quite a few Easter projects so that I can make them for my little ones for Easter morning and I thought it would be quite sweet for them have breakfast with these little egg cozys on their boiled eggs:)
I have used pure wool felt and made a butterfly, but you could also make a chicken, rabbit, ladybug etc... the possibilities are endless...
Knitted Easter Egg Cozy Pattern / Tutorial:
Cast on 9 stitches on circular needles. I have used the Magic Loop Method of knitting.
Knit 1 round
Knit into the front and back of each stitch in next round increasing your stitches to 18.
Knit 1 round
Knit into front and back of each stitch in next round increasing your stitches to 36.
Knit garter stitch for 12 rounds.
Knit 4 rounds of moss stitch or 4 rounds of purl for a rib and then cast off :)
Sew in all ends. Sew around the opening where you began knitting, just thread through the stitches and pull tight.
I cut out a butterfly shape and an abdomen.
Lay the abdomen inside the butterfly and pinch together and sew together from underneath. Sew your finished butterfly onto your cozy.
View from the back...
View from the front:)
I am going to make one for each member of our family with a different little felt creature on each cozy:)
Happy knitting everyone,
Warmly
Linda
Please note, this pattern is for personal use only, and not for resale, items knitted from this pattern may not be sold for commercial purposes, thank you.
Subscribe to:
Posts (Atom)