Showing posts with label Knitting Pattern. Show all posts

Tuesday, September 13, 2011

Bumble Bee Knitting Pattern

I had noticed that the Wisteria creeper was full of buds before we left for our holiday, it's amazing how a garden can change in just four days! We have returned to the most amazing display of mauve colour imaginable. When we were outside this morning feeding the chickens, Erin called me to come and have a look at the beautiful Wisteria flowers. When I went to her, she told me to listen... wow! There were hundreds of bumble bees flitting from one flower to the next. There were plenty of regular bees there too.

Well, as you can imagine, I was inspired to knit a little bee! So off I went and found some black and yellow mohair scraps, it needed to be mohair because little bees are so fuzzy and well full of pollen, so mohair was perfect.

I knitted him in the round on my circular needles but DPNs would work just as well too and after a few minutes, there he was, a little bee:)


Materials:
4mm / US 6 circular needles or DPNs
DK Kid Mohair yarn scraps
Merino fleece for stuffing
Wool needle for sewing up
Black and white fleece for the eyes
Felting needle

Pattern:

Cast on 6 stitches in black yarn and join for knitting  in the round.
Round 1: Knit
Round 2: Knit into the front and back of all the stitches across the round. (12 stitches)
Round 3: Join the yellow yarn, and knit the round.
Round 4: Knit into the front and back of all the stitches across the round. (24 stitches)
Round 5: Pick up the black strand and leave the yellow strand and knit the round.
Round 6: Knit
Round 7: Pick up the yellow strand and leave the black strand and knit round.
Round 8: Knit
Round 9: Pick up the black strand and leave the yellow strand and knit round.
Round 10: Knit
Round 11: Pick up the yellow strand and leave the black strand and knit 2 stitches together all across the round. (12 stitches)
Round 12: Knit
Round 13: Pick up the black strand and leave the yellow strand and knit 2 stitches together across the round. (6 stitches)
Round 14: Knit
Round 15: Knit

Stuff the little bee before you finish off, then break the yarn, thread the yarn through a wool needle and thread the needle through the remaining stitches. Finish off. This will be the stinger of the bee.

Wings:
With a wool needle, sew two black loops over each other for each wing.

Eyes:
Needle felt the eyes, first with white fleece and then a little black circle of fleece in the centre of the eye.

You are finished:)


Can you see this little bumble bee in the photo above?


Thank you so much for your thoughts for Kye today, he went into hospital early this morning, everything went smoothly and he is recovering at home, he is back to his normal self already:)

Happy knitting and have a lovely week:)
xo
Linda

Sunday, May 29, 2011

600th Blog Post Giveaway

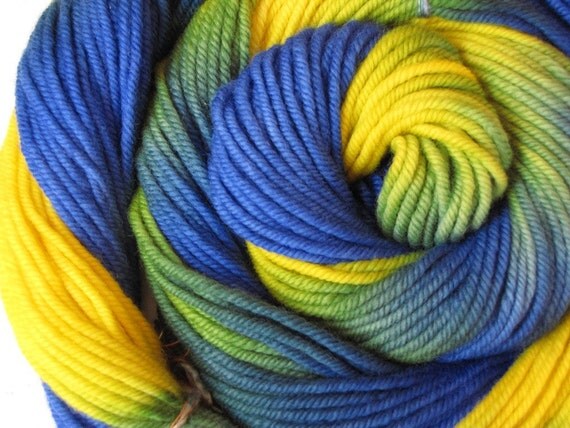
I have reached the 600th post mark on my blog and I felt I would celebrate by having a giveaway! I will be giving away this very vibrant and colourful aran weight yarn and a pattern to one reader. I have so enjoyed the years blogging since I started in 2008 and have connected with wonderful friends all across the globe. You have all taught me so much and I am filled with gratitued :)

If you would like to enter my giveaway, just leave a comment and I will choose a winner on Tuesday evening, I will post the winner's name here in this blog post. Please make sure I have a way to reach you if you win.

Winner:
Cybele said...
Congrats on 600th posts! I have only started blogging so hitting the 600th mark seems unfathomable to me right now. Great read and some awesome patterns to boot!

Congratulations!! Please could you send me your postal details:)

May 29, 2011 8:48 PM
Happy Sunday
xo
Linda

Rainbow Aran Merino Hand Painted Yarn 3.5 ounces / 100 grams

Rainbow Aran Merino Hand Painted Yarn 3.5 ounces / 100 grams

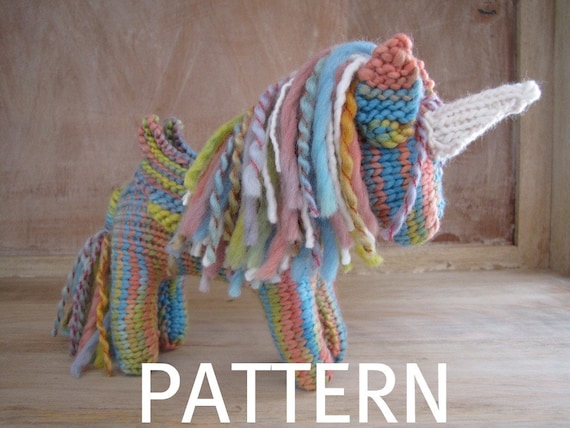
Rainbow the Pegasus Unicorn with Wings Pattern, PDF

Thursday, March 24, 2011

Horse Knitting Pattern is in the Shop!

Yay! I am happy to announce that my horse knitting pattern is finished and in my Mamma4earth shop:)
The pattern requires handspun or DK yarn and size 4mm straight knitting needles. It is fairly easy, knitted in stocking stitch with increasing and decreasing. This horse is knitted flat with two needles. The pattern is very detailed and is 10 pages long with instructions and photos to guide you through the creation process. If knitted in a handspun yarn your horse will measure approx 7.5 inches / 8 inches from tail to nose.
Happy Thursday!
See you all tomorrow on Creative Friday:)
xo
Linda


Wednesday, March 23, 2011

WIP Wednesday, Knitted Horse Pattern

This is my WIP at the moment, I have been working on a design for a knitted horse / unicorn / pegasus pattern... I have been trying to get the proportions just right and make his neck curve elegantly over to compliment his hindquarters. Tomorrow I will add the mane and tail and then he will be finished. I have knitted him partly in the round here, but the pattern will be a flat knit with two needles. The pattern will also have instructions for a unicorn horn and eventually I will add wings as well for a pegasus. I should be listing this pattern in my shop tomorrow as soon as he is finished...


Happy Wednesday :) xo

Tuesday, March 15, 2011

Easter and Spring Knitting Patterns & Tutorials from This Year and Last Year

Hi everyone, I thought I would blog all of my Easter and Spring patterns and tutorials here, some are from last year and others are from this year with more to follow in the next few weeks:)
Enjoy crafting and knitting:)


Easter Rabbit Pattern.


Knitted Easter Egg Pattern.


Easter Nest with Eggs Pattern (these eggs are half the size of my other eggs).

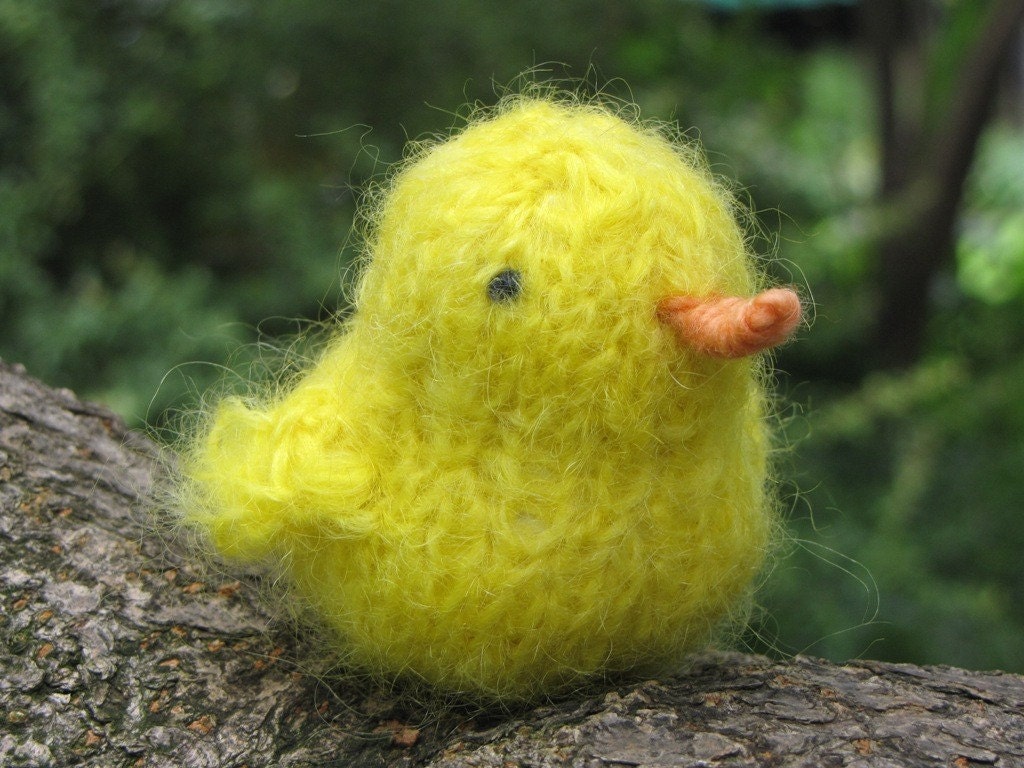
Easter Chicken. Soft Mohair Yarn

Easter Chicken Pattern.

Easter/Spring Robin's Nest Tutorial


Bluebird Knitting Pattern.


Easter Gift Bag Tutorial.


Dandelion Knitting Pattern.


Easter / Spring Egg Cozy Pattern.

Ladybug Pattern.


Spring Mobile Tutorial.


Spring Knitted Snail Pattern.

Sunday, January 30, 2011

Knitting Sheep, The Pattern Thought Process...

I have been working on a new sheep pattern, I love the process... thinking a pattern into a form... 
I study photos of the animals I am designing, look at their shape, imagine their movement in my mind and think about how that would affect their musculature and overall appearance. Then, I look to their jaw line, how it tapers and how it balances with the curve of their neck and back...


So today it was the sheep, I drew him, noticing how his neck and head extend outwards as if he is reaching forward to grasp something. His face also tapers very slightly downwards and upwards as if converging to a central point of meeting, at the muzzle or snout. The back legs are quite muscular compared to the front legs and the tummy section is quite a bulk of form. Even the little ears I have noticed after looking at many photos of sheep, actually stand a little out to the sides of his head and don't hang straight down...

This is how I like to look at an animal before I design a pattern, once I have an understanding of their shapely detail I can imagine the stitches and convert them to the written pattern instructions:)


Taking photos today was quite an interesting process, the chickens were intent on coming over to have a closer look at what I was doing...


The sheep...


He will be going into my shop his pattern is already listed:) I have also added him to Ravelry, I am there as Mamma4earth.

Thursday, January 20, 2011

Valentine Heart Knitting Pattern, Tutorial

Today I have been working on a little pattern for a Valentine Heart and I am so please to be finished and to be able to share it here. It really is the easiest pattern, knitted entirely in garter stitch, flat with the slightest shaping on the sides. They knit up quickly and look wonderful in garter or stocking stitch too, if you would like to add some variation. I embroidered a heart on mine, but you could also embroider the word 'love' or someone's name for instance, too. Ok enough talking from me, here is the pattern:)


Materials:
Red yarn for your heart
White yarn for embroidery
Roving for stuffing
Wool needle for sewing up

Pattern: (Knit two sides)
Cast on 1 stitch.
Row 1: Knit
Row 2: Increase into the first stitch, knit to the end, increase into the last stitch. (3 stitches)
Row 3: Knit
Row 4: Increase into the first stitch, knit to the end, increase into the last stitch. (5 stitches)
Row 5: Knit
Row 6: Increase into the first stitch, knit to the end, increase into the last stitch. (7 stitches)
Row 7-8: Knit
Row 9: Increase into the first stitch, knit to the end, increase into the last stitch. (9 stitches)
Row 10: Knit
Row 11: Increase into the first stitch, knit to the end, increase into the last stitch. (11 stitches)
Row 12: Knit
Row 13: Increase into the first stitch, knit to the end, increase into the last stitch. (13 stitches)
Row 14-21: Knit
Row 22: Knit 2 stitches together at the beginning of the row, knit until the last 2 stitches and knit 2 together. (11 stitches)
Row 23: Knit 2 stitches together at the beginning of the row, knit until the last 2 stitches and knit 2 together. (9 stitches)
Row 24: Knit 2 stitches together at the beginning of the row, knit until the last 2 stitches and knit 2 together. (7 stitches)
Cast off

Once you have knitted two sides, sew right sides together and leave a little opening for stuffing. Turn onto the right side and stuff. Once your heart is lovely and firm, sew closed.


Sew a thread at the base of your heart, push your needle up throught the inside of the heart and pull it out the top of the heart.


Push the needle back into the top of the heart and pull it out the base of the heart where you started sewing.


Pull quite tightly so that a depression is seen on the top of the heart giving you the wonderful heart shape:) and finish off.
I embroidered a little heart and also added some yarn for a hanging ornamnet:)


Enjoy!
xo
Linda

Please note, this pattern is for personal use only, and not for resale, items knitted from this pattern may not be sold for commercial purposes, thank you.

Wednesday, December 15, 2010

Christmas Santa Boot / Stocking Ornament Knitting Pattern, Handmade Holiday 2010

Today I have knitted up a little Santa boot or Christmas stocking as an ornament for our tree... It is such a quick and easy knit, I have not knitted it in the round but flat this time:)
Enjoy!

Materials:
I used handspun Merino
4 mm knitting needles
fleece
ribbon
wool needle
embroidery needle
thread

Pattern:
Cast on 24 stitches
Knit 6 rows in stocking stitch
Row 7: Knit 2 stitches together at the beginning and end of the row.
Row 8: Purl.
Row 9: Knit 2 stitches together at the beginning and end of the row.
Row 10: Purl.
Row 11: Cast off 4 stitches, knit to the end of the row.
Row 12: Cast off 4 stitches, purl to the end of the row.
Knit in stocking stitch for the next 8 rows.
Change to a white yarn, knit 1 white row.
Purl 1 white row.
Cast off
Yay, you are done!

Finishing off:
Sew up with right sides facing and then turn onto the right side. I added a little fleece inside the boot to give it some shape. Sew on your Christmas ribbon and hang on your tree:)


Wishing you all a wonderful day:)
xo
Linda
Please note, this pattern is for personal use only, and not for resale, items knitted from this pattern may not be sold for commercial purposes, thank you.

Saturday, November 20, 2010

Christmas Wreath Knitting Pattern, Minature

Today I designed a quick pattern for a minature wreath. This little wreath will look lovely adorning your Christmas tree, front door or anywhere in your home. I love hanging these tiny ornaments on our door handles just to spread the Christmas cheer throughout our home:)
Materials:
Green and red yarn. I used brushed Mohair for the wreath and DK yarn for the bow.
2 double pointed needles
Wool sewing needle
Scissors
Pipe Cleaner if you would like your wreath to be stronger, I haven't used one.

Pattern:
I have knitted this entire pattern with I-Cords, which make it super easy.
I knitted two 10 inch I-Cords for the wreath.
For the first I-cord I cast on 4 stitches and for the second I cast on 3 stitches.


The two I-cords for the wreath, sew in ends.


Sew the 2 ends of one side of your I-cords together.


Twist your two I-cords around one another.


Once you have twisted your two I-cords around one another, sew the other ends together.


Now join your ends and make a circle for your wreath.


With your red yarn, cast on two stitches and knit a 7 inch I-cord. Cast off and sew in your ends.


Fold for a bow and secure with a stitch.


Attach your bow to your wreath.


Hanging on our front door...


Finished!
Enjoy...
Happy weekend:)
xo
Linda
Please note, this pattern is for personal use only, and not for resale, items knitted from this pattern may not be sold for commercial purposes, thank you.

LinkWithin

Related Posts Plugin for WordPress, Blogger...